> ## Documentation Index
> Fetch the complete documentation index at: https://dynamic-docs-feat-sidebar-revamp.mintlify.site/llms.txt
> Use this file to discover all available pages before exploring further.
# Setup Embedded Wallets
### Enable in Dashboard
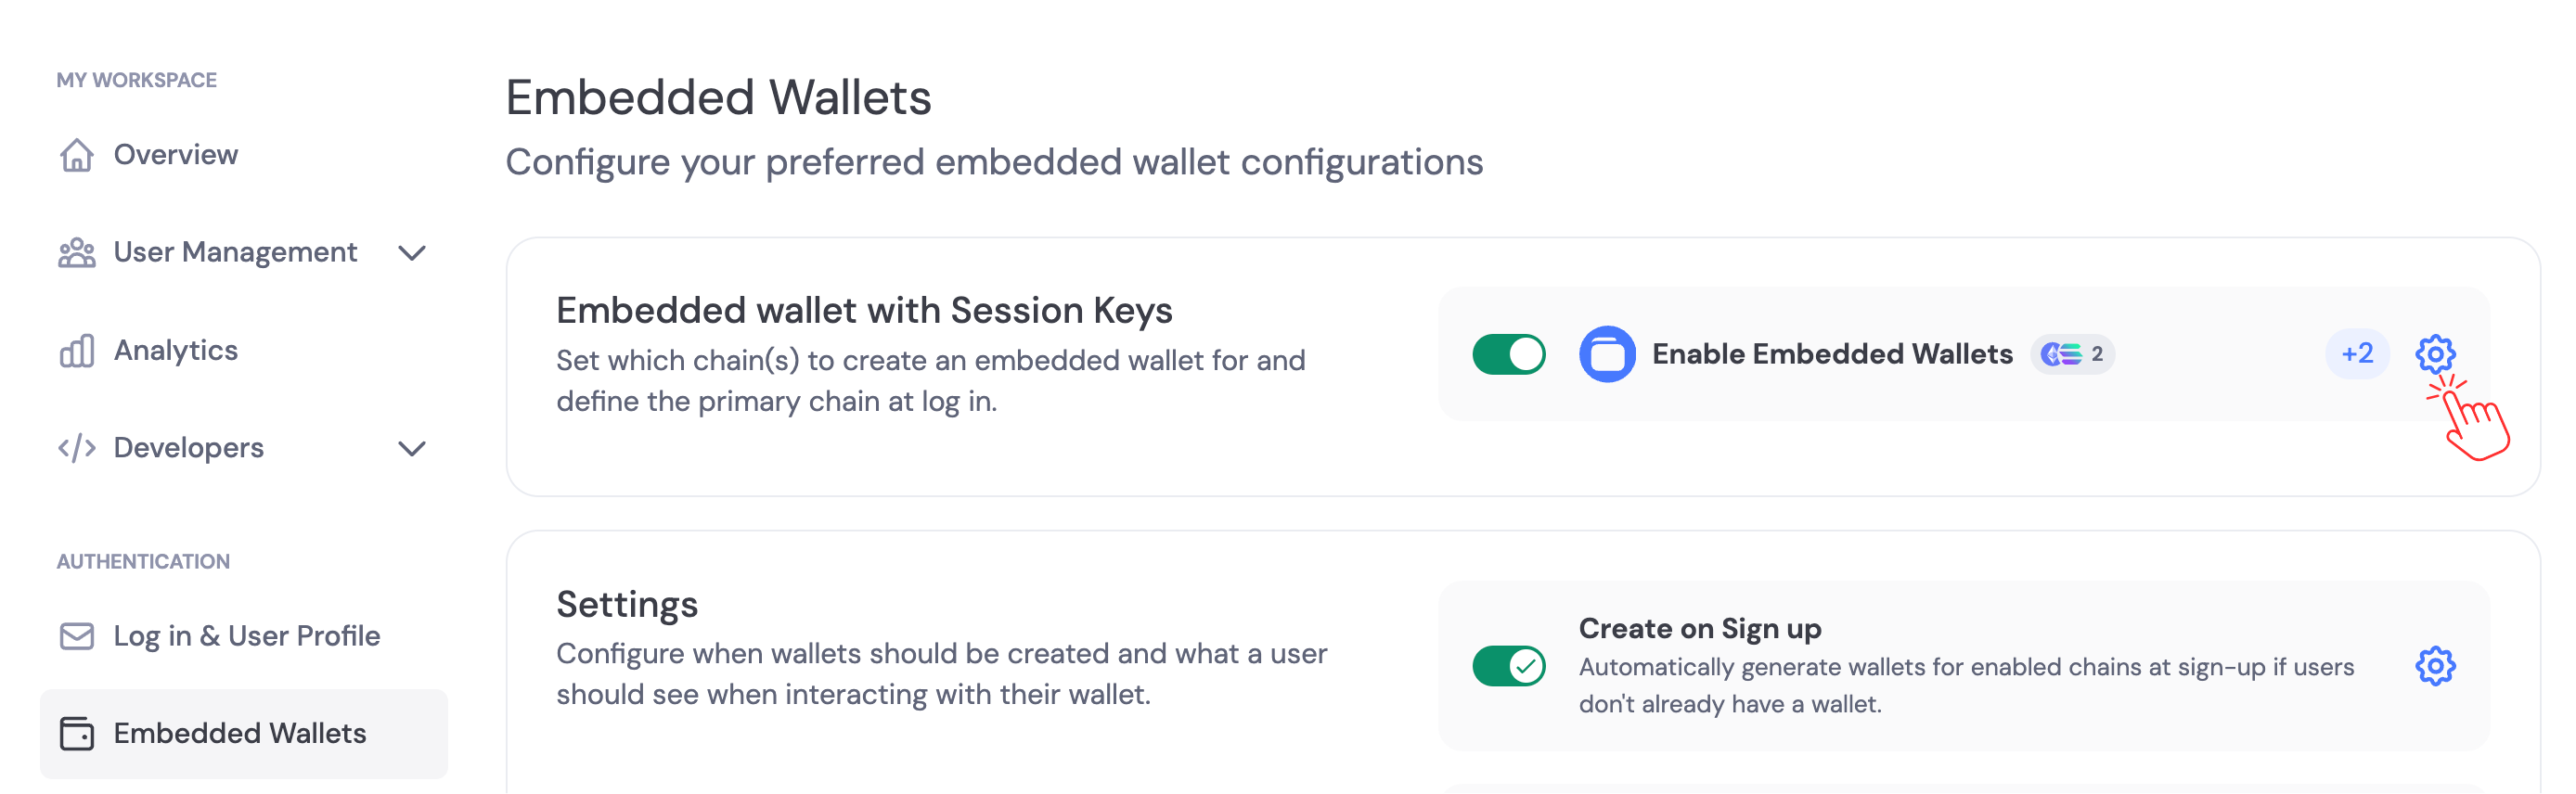
Navigate to the [Dynamic Dashboard > Developers](https://app.dynamic.xyz/dashboard) and enable Embedded Wallets, then click settings and choose the chains you'd like wallets created on.
### Set up Your SDK
Only only supported on react sdk v4.20.0 and later versions
Reference example: [https://github.com/dynamic-labs/mpc-react-demo](https://github.com/dynamic-labs/mpc-react-demo)
Note: You only need to install the connectors for the chains you want to support.
```bash
npm i @dynamic-labs/sdk-react-core
npm i @dynamic-labs/ethereum
npm i @dynamic-labs/solana
npm i @dynamic-labs/sui
```
You must whitelist the dynamic auth URL for the iframe connection to work. Here's how:
```js
res.setHeader("Content-Security-Policy", "frame-src https://app.dynamicauth.com 'self';");
```
> ⚠️ If you're already setting CSP, append [https://app.dynamicauth.com](https://app.dynamicauth.com) to the existing frame-src list rather than replacing it.
***
```html
```
```
add_header Content-Security-Policy "frame-src https://app.dynamicauth.com 'self';";
```
```json vercel.json
{
"headers": [
{
"source": "/(.*)",
"headers": [
{
"key": "Content-Security-Policy",
"value": "frame-src https://app.dynamicauth.com 'self';"
}
]
}
]
}
```
```txt _headers
Content-Security-Policy: frame-src https://app.dynamicauth.com 'self';
```
Include the appropriate connectors inside your provider settings:
```jsx
import { EthereumWalletConnectors } from '@dynamic-labs/ethereum';
import { SolanaWalletConnectors } from '@dynamic-labs/solana';
import { SuiWalletConnectors } from '@dynamic-labs/sui';
const connectors: [
EthereumWalletConnectors,
SolanaWalletConnectors,
SuiWalletConnectors,
],
return (
{/* Your app components */}
);
```
Now, once logged in, users will have an embedded wallet for each chain you have enabled. For more detailed options around wallet creation, see the [Creating Wallets](/wallets/embedded-wallets/mpc/creating-wallets) guide.
You can find plenty of examples in [Using Wallets](/wallets/using-wallets/interacting-with-wallets#chain-specific-interfaces). Here's a simple example of fetching the public and wallet client on Ethereum.
```jsx
import { useDynamicContext } from '@dynamic-labs/sdk-react-core';
import { isEthereumWallet } from '@dynamic-labs/ethereum';
const { primaryWallet } = useDynamicContext();
if(!isEthereumWallet) return;
const publicClient = await primaryWallet.getPublicClient();
const walletClient = await primaryWallet.getWalletClient();
```
For certain functionality, you will need to access the connector directly and type it as a DynamicWaasEVMConnector, DynamicWaasSVMConnector or DynamicWaasSuiConnector.
Here's an example for Ethereum.
```jsx
import { isDynamicWaasConnector } from '@dynamic-labs/wallet-connector-core';
if(!primaryWallet || !isDynamicWaasConnector(primaryWallet.connector)) {
return;
}
const waasConnector = primaryWallet.connector;
const walletAccount = await waasConnector.createWalletAccount();
// get a wallet client for the wallet account by address
await waasConnector.getWalletClientByAddress({
accountAddress: walletAccount.accountAddress,
});
// Export the client keyshares, a txt file will be downloaded on the client
await waasConnector.exportClientKeyshares({
accountAddress: walletAccount.accountAddress,
});
// Export the private key (requires a display container for security)
await waasConnector.exportPrivateKey({
accountAddress: walletAccount.accountAddress,
displayContainer: document.createElement('iframe'), // Replace with your secure container
});
// Import a private key to create a new wallet
const importedWallet = await waasConnector.importPrivateKey({
privateKey: 'your-private-key-here', // Replace with actual private key
});
```